Giving My Projector a Remote Control
I have a projector set up on my desk for when I want a theater experience in my room. It’s a portable “pico” projector that runs Android. Since I don’t really carry it around, it’s tucked into a corner, ready to be used without the need for setup each time.
However, one thing continued to bother me: the projector doesn’t have a remote control. This means I have to get up and use its touchpad to move the cursor and select items on the screen. I partially solved this issue by connecting a Roku stick. However, I still had to walk over to the projector to turn it on or off. Additionally, the projector always boots into its home screen, so I have to manually switch the input each time. While Roku does support controlling connected devices, it wasn’t helpful in this case because the projector lacks HDMI-CEC support or an IR receiver.
One day, I was trying to reconnect the charging cable that became loose. As I fumbled with the cable, I discovered that the projector turns itself on when given a specific power cycle. That’s when I came up with an idea. Now I know the projector can be turned on without touching it. I can turn it off as well by sending an ADB command, right? I might be able to control the volume and change the input too through ADB!
The brain
The projector cannot do anything before it has power. So, an external device had to be added. The brain doesn’t have to have powerful processor but it needs to run ADB. I decided to use my old Raspberry Pi 1B, which was a perfect choice. I brushed up some dust it was collecting and put a freshly imaged SD card into it. It was ready to go!
Turning it on
While thinking how to power cycle the projector remotely, I recalled that my computer cut power to a USB port when it was overloaded. This sparked the thought that there must be a specification in the USB standard that allows for controlling the power to the ports. After a quick online search, I discovered that it is indeed defined in the standard and is called Per-Port-Power-Switching(PPPS). I thought I could potentially control the power without the need for any external hardware.
However, when I disassembled the USB hub I had newly bought for the project, I was very disappointed. The power rail was directly connected to the ports through physical switches, and there were no PPPS pins exposed on the hub chip. Apparently, PPPS is often omitted by the hub manufacturers, even for the quality ones! That’s okay. I had a backup plan: I decided to modify the hub myself.
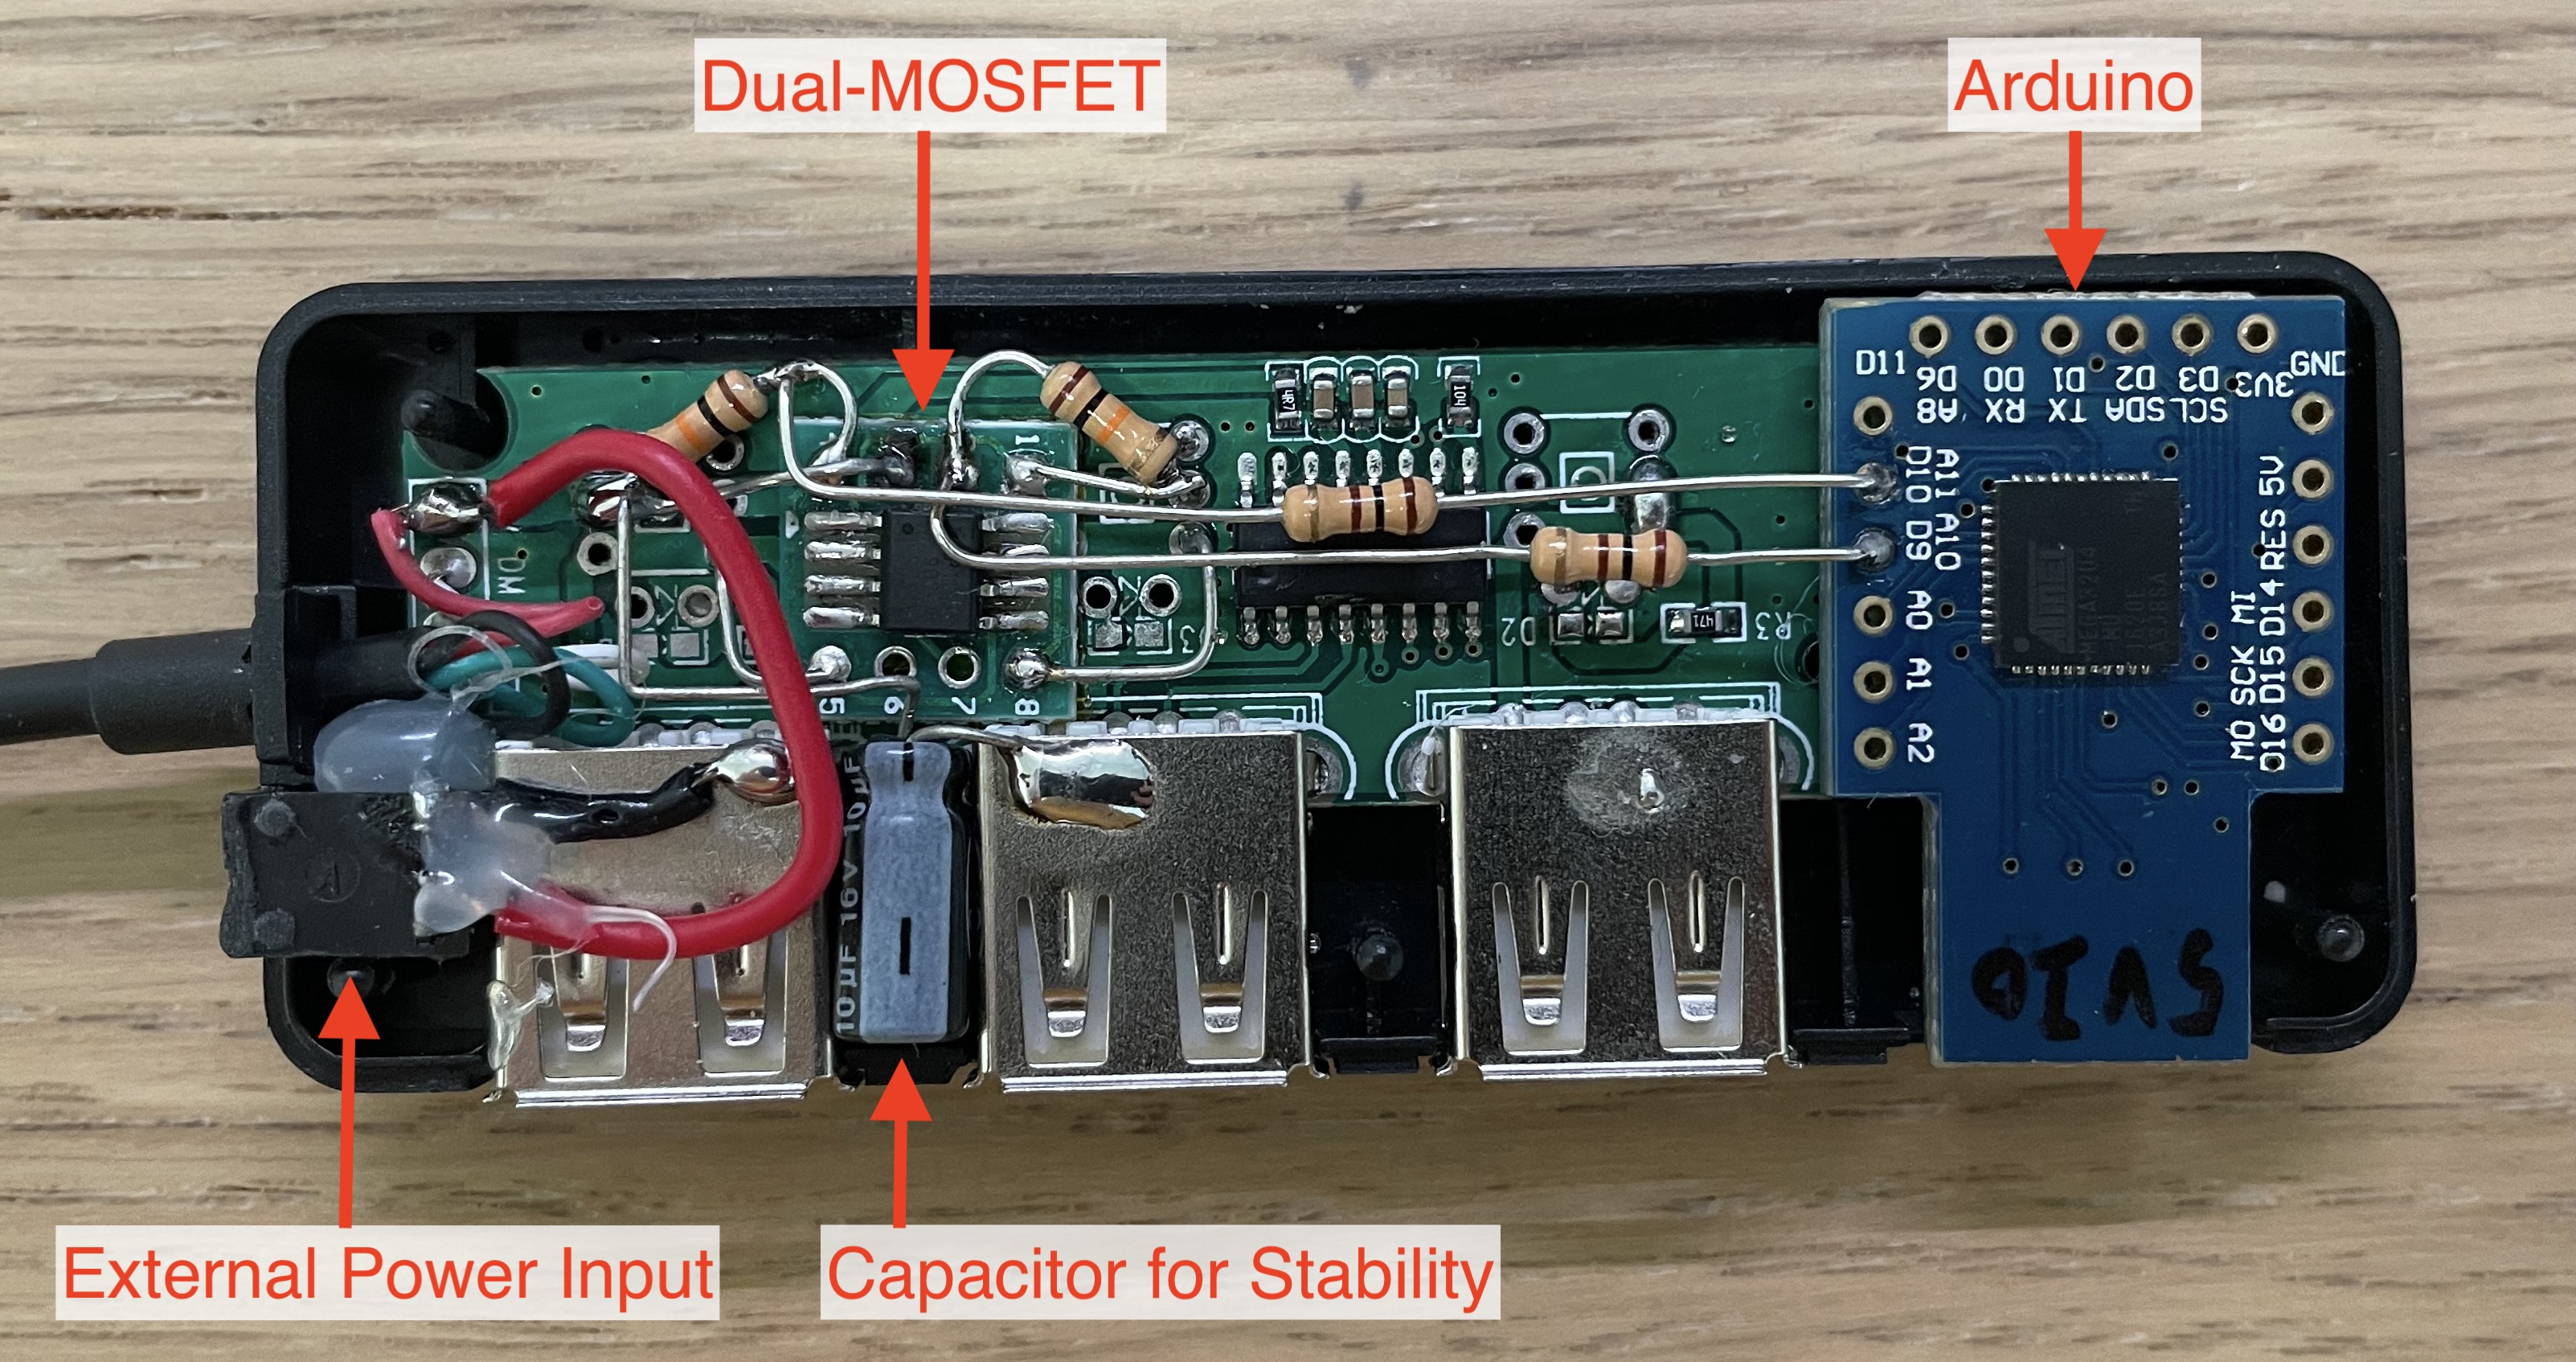
I removed the switches and soldered some components instead. I dedicated one port to a small Arduino board to process commands from a host. To control power to two of the remaining three ports, I used a dual-MOSFET chip. I also added a barrel jack and a capacitor to ensure sufficient power delivery to the projector and prevent brownouts. After making some modifications—such as cutting stand-offs and creating a hole for the power jack—all of these components fit neatly into the original case.
I wrote and uploaded a simple Arduino sketch that receives a port number and a desired power state to my modified hub. Additionally, I created a Python script to cycle the power by sending serial commands to the hub. Now, I can turn the projector on without needing to press the power button.
Contolling volume & turning it off
Once the projector is on, custom-made electronics are no longer needed. I enabled USB debugging in the developer settings, and the projector was ready to receive commands via ADB.
It was fairly easy to find what commands to use. The command below turns the projector off:
$ adb shell reboot -pTo adjust the volume, volume up/down key presses can be emulated using the following commands:
$ adb shell input keyevent KEYCODE_VOLUME_UP
$ adb shell input keyevent KEYCODE_VOLUME_DOWN
Changing input
Changing input was a bit more complicated. While power and volume control are standard features on most Android devices, changing the input is a unique feature of my projector. I needed to figure out how the projector switches inputs. My first thought was that I could just launch the app that displays the HDMI feed. I listed the packages installed on the projector to see if anything stood out.
$ adb shell pm list packages
# Excluded packages starting with `com.android` or `com.google` for conciseness.
package:com.gaea.gcast
package:com.lguplus.appstore
package:celluon.celluonsettings
package:com.rockchip.wfd
package:com.svox.pico
package:jp.co.omronsoft.openwnn
package:celluon.celluonlauncher
package:com.skt.skaf.OA00018282
package:android.rk.RockVideoPlayer
Unfortunately, I couldn’t find anything that led to the answer. I thought I had hit a dead end.
I read through the ADB documentation hoping to find something I could use. When
I came across the activity manager (am) commands, I had another idea. Do I
really needed to identify the package? Coming from iOS development, I had
always assumed an app must be in the foreground to open a “view”. It must be
different in Android. I’d seen some apps overlay their activities on top of
another app - like Facebook Messenger chat heads. This gave me a thought. I
might be able to open the activity showing the HDMI feed no matter which app is
active.
I manually changed the input to HDMI and issued an ADB dumpsys command to
inspect what activity was open.
$ adb shell "dumpsys window windows | grep -E 'mCurrentFocus|mFocusedApp'"
  mCurrentFocus=Window{3e6b44da u0 celluon.celluonlauncher/celluon.celluonlauncher.HDMIActivity}
  mFocusedApp=AppWindowToken{17ea32cd token=Token{34a4e064 ActivityRecord{3bc3f9f7 u0 celluon.celluonlauncher/.HDMIActivity t3}}}
Eureka! It was an activity of the launcher! It’s a little odd that it’s handled by the launcher, especially when other inputs such as wireless mirrorings have dedicated packages, but whatever. Time to test my theory: I navigated back to the home screen and executed an activity manager command to launch the HDMI activity.
$ adb shell \
    su -c \
    am start \
    -a android.intent.MAIN \
    -n celluon.celluonlauncher/celluon.celluonlauncher.HDMIActivity
And it worked! I can now programmatically control everything I need!
Receiving IR
Next, I wanted to control everything I had done so far with a remote. A Roku remote is normally paired with Bluetooth to a Roku device. But it also includes an IR transmitter for controlling TVs. I decided to take advantage of this feature.
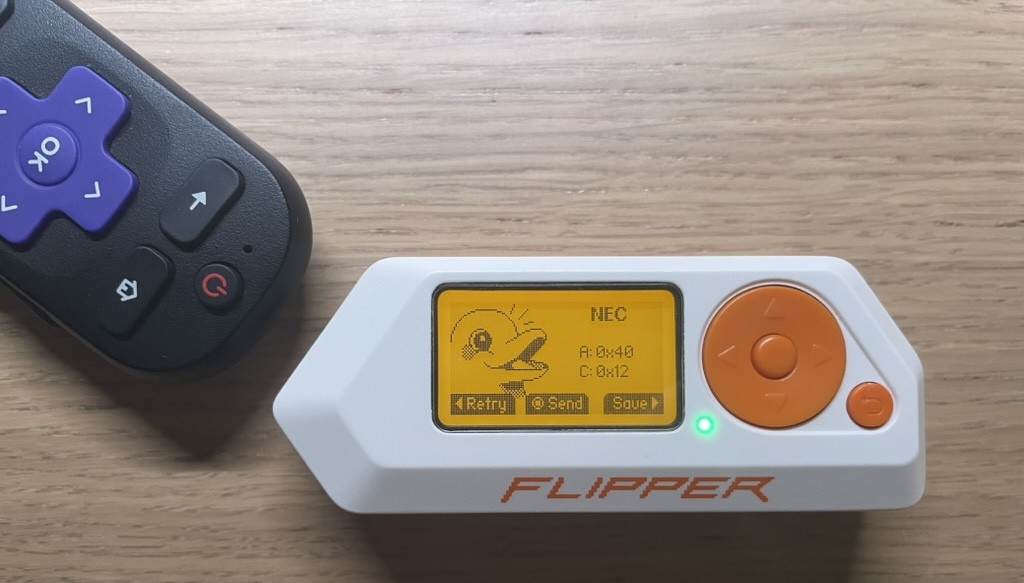
First, I went into the Roku’s remote settings and chose a random TV brand. It enabled the remote’s IR capability. Then, I pointed the remote at my Flipper Zero and recorded the signals. It gave me the codes for the power, volume up/down, and mute buttons.
Next, I needed an IR receiver. Ideally, I would have connected a dedicated IR
receiver to the Pi’s GPIO pins. Unfortunately, I didn’t have an IR receiver on
hand. Instead, I “temporarily”(wink wink) used my Flipper Zero. Flipper Zero
exposes a serial interface when connected to a host via USB. I wrote a Python
script that connects to this interface and waits until the prompt is shown. The
script then puts Flipper Zero into IR receiving mode by sending ir rx. It
processes the output and yields Python enums whenever an IR signal is detected.
Putting it all together
Final step! I completed my Python script by integrating all the components I’ve written so far. The script waits indefinitely for an IR signal to be received. Based on the code received, it performs the following actions:
- When the power button is pressed, it checks the ADB device list to determine
if the projector is turned on.
- If the projector is on: it sends an ADB command to shut it down.
- If the projector is not on: it power cycles the USB port to turn the projector on.
- When the volume up or down button is pressed, it sends an ADB command that emulates a hardware key press.
- When the mute button is pressed, it changes the input to HDMI. Since the Roku remote does not have an input button, I repurposed the mute button for this function.
Finished scripts can be found here.
The completed setup looks like this:
 Notice I’m back-feeding power to the Raspberry Pi from the USB hub. This is
generally not recommended as it bypasses the Pi’s internal fuse. It should be
fine with a quality power supply with proper protections. I used a USB charger
that is known to be resilient against various faults that can occur.
Notice I’m back-feeding power to the Raspberry Pi from the USB hub. This is
generally not recommended as it bypasses the Pi’s internal fuse. It should be
fine with a quality power supply with proper protections. I used a USB charger
that is known to be resilient against various faults that can occur.
Result

And there we go! I can now just sit back, grab a remote, and enjoy my binge-watching sessions without interruptions. There is still room for improvements. I can replace the Pi 1B with a Pi Zero series board and use a dedicated IR receiver to reduce the size and power draw. But it works fine for me as-is so the improvements can be a future project.
I had a lot of fun working on this project. It not only solved my very specific problem but also gave me challenges along the way. Overcoming these challenges has made me proud. I’ve proven to myself that I can solve problems, even if they require knowledge I didn’t initially have. Remembering small details and using them as clues to find solutions really goes a long way.